The Best Fluffy Pancakes recipe you will fall in love with. Full of tips and tricks to help you make the best pancakes.
⭐⭐⭐⭐⭐ 5/5
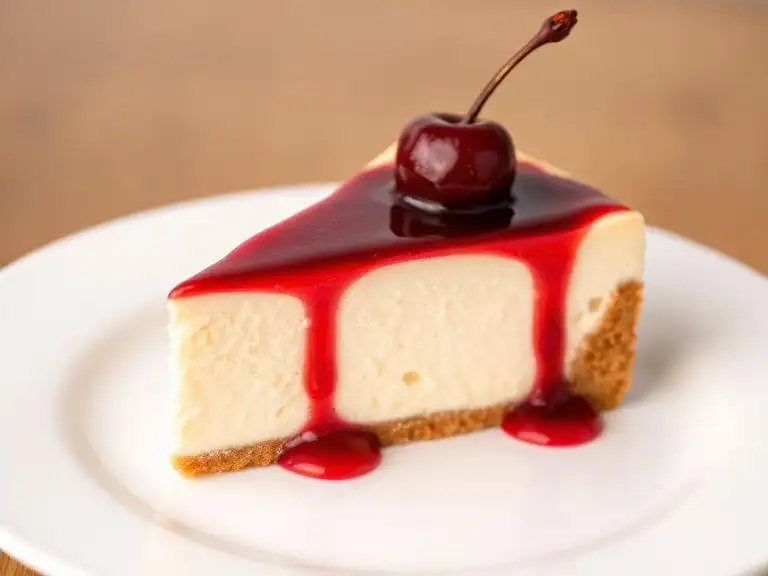
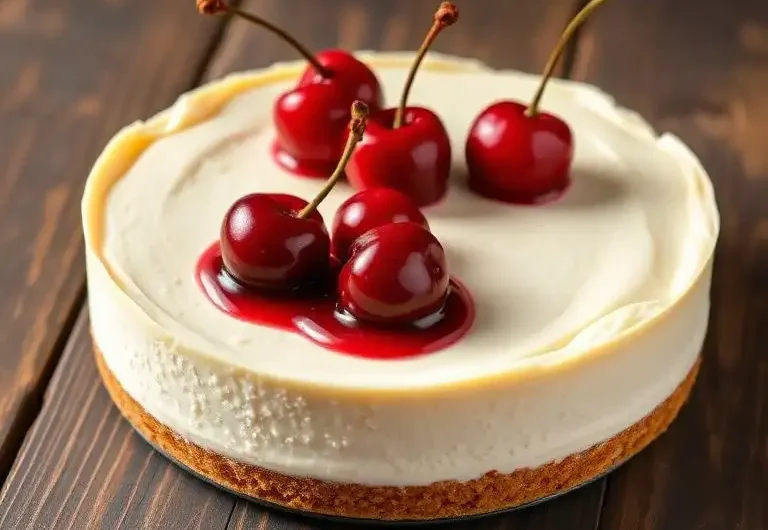
cherry cheesecake recipe : Silky, cloud-like filling with a buttery graham cracker crust and glossy cherry topping. Every forkful is impossibly smooth, rich, and cold-set to perfection — no oven required.
Table of Contents
Recipe Details
| Prep Time | Chill Time | Total Time | Servings |
|---|---|---|---|
| 25 minutes | 6–8 hours (overnight best) | ~8 hours | 8–10 slices |
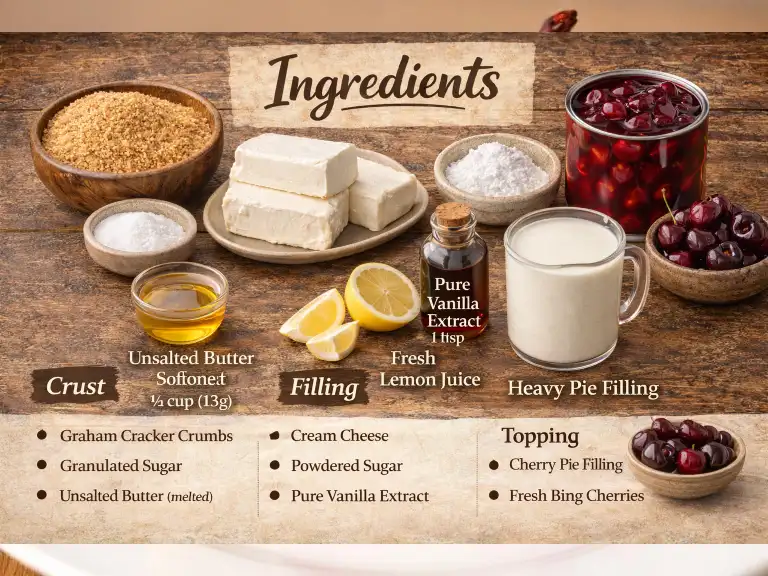
Ingredients
Crust
- 2 cups (200g) graham cracker crumbs (about 14 full crackers)
- ¼ cup (50g) granulated sugar
- ½ cup (113g) unsalted butter, melted and slightly cooled
Filling (all ingredients at room temperature — 68–70°F / 20–22°C)
- 24 oz (680g) full-fat block cream cheese (not spreadable tub)
- 1 cup (120g) powdered sugar, sifted
- 1 teaspoon pure vanilla extract
- 2 tablespoons fresh lemon juice
- 1½ cups (360ml) heavy whipping cream, very cold (straight from fridge)
Topping
- 1 can (21 oz / 595g) cherry pie filling (or homemade cherry compote)
- Optional: fresh Bing cherries for garnish
OTHER RECIPES :
- Easy Thumbprint Cookie Recipe – Perfectly Buttery Every Time
- Best M&M Cookie Recipe (Thick, Gooey & Easy to Make)
- The Best Peach Cobbler Recipe with Cake Mix So Easy So Delicious!
Instructions
Step 1 : Build the Crust
Combine graham cracker crumbs, sugar, and melted butter in a bowl. Mix until the texture resembles wet sand — every crumb should glisten with butter. Press firmly into the bottom and 1 inch up the sides of a 9-inch springform pan. Use the flat base of a measuring cup to compact it tightly with no gaps or thin patches. Freeze the crust for 15 minutes while you prepare the filling.

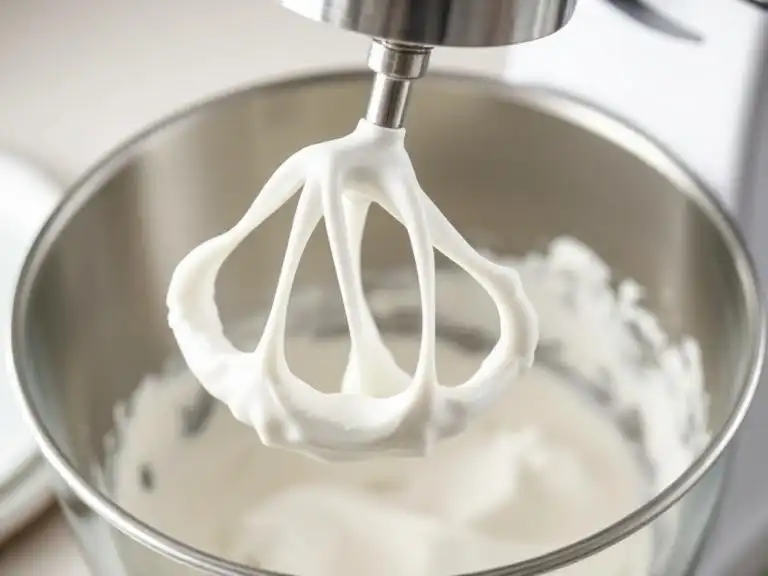
Step 2 : Whip the Cream to Stiff Peaks
Pour the cold heavy whipping cream into a large chilled bowl. Beat with a hand or stand mixer on medium-high speed for 2–3 minutes until stiff peaks form — the cream should hold its shape when the beaters are lifted and not slide. Do not over-whip. Set aside in the refrigerator.
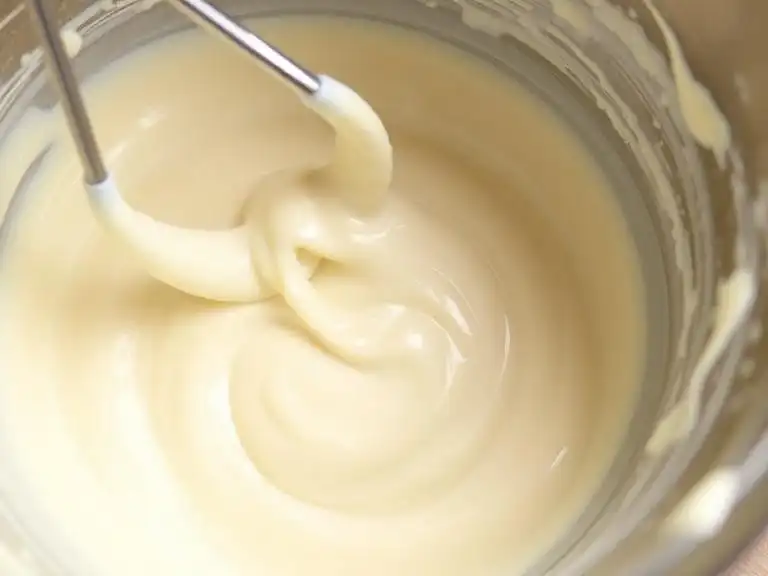
Step 3 : Beat the Cream Cheese Until Velvet-Smooth
In a separate large bowl, beat the room-temperature cream cheese on medium speed for 3–4 full minutes until it is completely lump-free and fluffy — this step is the secret to ultra-creaminess. Scrape down the bowl sides twice. Add sifted powdered sugar, vanilla extract, and lemon juice. Beat again for 2 minutes until the mixture is silky, glossy, and smooth with no streaks.
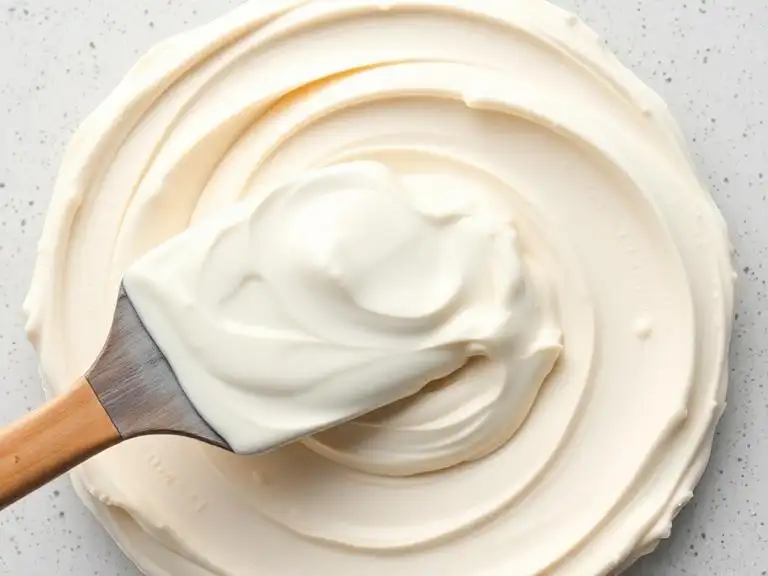
Step 4 : Fold and Finish the Filling
Remove the whipped cream from the fridge. Using a large rubber spatula, gently fold the whipped cream into the cream cheese mixture in three additions — use wide, sweeping motions from the bottom up. Stop as soon as the batter is uniformly pale, airy, and cloud-like with no white streaks. Overmixing will deflate the filling and compromise creaminess.
Step 5 : Fill, Smooth, and Chill
Pour the filling into the frozen crust. Use an offset spatula to spread it into an even, domed layer — smooth the top with slow, confident strokes. Tap the pan gently on the counter twice to release air bubbles. Cover tightly with plastic wrap and refrigerate for a minimum of 6–8 hours. Overnight chilling produces the cleanest slices and fullest flavor development.
Step 6 : Top and Serve
Run a thin knife around the inside edge of the springform ring before releasing. Spoon the cherry pie filling over the chilled cheesecake, spreading to the edges. Slice with a sharp knife dipped in hot water and wiped dry between each cut for bakery-clean slices. Serve immediately or refrigerate topped for up to 24 hours.
Cheesecake Expert Tips — No Cracks, Maximum Creaminess
Room temperature is non-negotiable. Cold cream cheese will never fully smooth out, leaving a lumpy, dense filling. Pull it from the fridge at least 1 hour before mixing.
Beat cream cheese alone first. Beating it solo before adding other ingredients breaks down every protein cluster — this is what separates a silky professional cheesecake from a grainy homemade one.
Keep your cream cold. Unlike the cream cheese, the heavy cream must stay refrigerated until the moment you whip it. Warm cream won’t achieve stiff peaks.
No water bath needed. Because this is a no-bake cheesecake, you bypass the cracking risk entirely. For baked versions, always use a water bath (bain-marie) and never open the oven during baking.
Don’t rush the chill. Six hours is the minimum; overnight is ideal. The filling needs time to fully set so it slices cleanly without collapsing.
Freeze for 30 minutes before slicing if you need ultra-precise, restaurant-style slices for photography or events.
Why This Cheesecake Is Ultra-Creamy
This cherry cheesecake recipe achieves its signature texture through three pillars: full-fat block cream cheese (not whipped tub varieties, which contain added water and stabilizers), hand-folded stiff whipped cream for airiness without deflation, and extended cold-setting time that allows the fat molecules to re-solidify into a stable, mousse-like structure. The lemon juice also subtly brightens the dairy and keeps the filling from tasting heavy or cloying. The result is a filling that is firm enough to slice cleanly but melts the moment it hits your palate.
Nutrition (Per Serving, based on 10 slices)
| Calories | Fat | Saturated Fat | Carbs | Sugar | Protein |
|---|---|---|---|---|---|
| 520 kcal | 36g | 21g | 44g | 31g | 6g |
Nutrition is estimated and will vary based on brands and exact quantities used.
Frequently Asked Questions
1. Can I use a store-bought crust? Yes — a pre-made 9-inch graham cracker crust works in a pinch, but a homemade crust gives you thicker, sturdier sides that hold up better when slicing and serving.
2. Can I make this cheesecake the day before? Absolutely. This is actually the preferred approach. Overnight chilling yields the cleanest slices and the most developed flavor.
3. Can I use low-fat cream cheese? It is not recommended. Reduced-fat cream cheese contains more moisture and less fat, which prevents the filling from setting firmly and results in a softer, less creamy texture.
4. Why is my filling lumpy? The most common cause is cold cream cheese. Always bring it fully to room temperature and beat it alone for at least 3–4 minutes before adding any other ingredients.
5. Can I use homemade cherry topping instead of canned? Yes. Simmer 2 cups fresh or frozen pitted cherries with ¼ cup sugar, 1 tablespoon cornstarch, and 2 tablespoons lemon juice over medium heat until thickened. Cool completely before topping the cheesecake.
6. How long does this cheesecake keep? Covered in the refrigerator, it keeps well for up to 5 days. Add the cherry topping only on the day of serving to keep the crust from softening.
7. Can I freeze this no-bake cheesecake? Yes. Freeze without the cherry topping, tightly wrapped, for up to 1 month. Thaw overnight in the refrigerator before topping and serving.
8. My cheesecake filling is too soft and won’t hold its shape. What went wrong? Either the cream was under-whipped (not stiff peaks), the cream cheese was over-beaten after the cream was folded in, or it wasn’t chilled long enough. Ensure stiff peaks before folding and allow a full overnight chill.
9. Can I make this gluten-free? Yes — simply substitute gluten-free graham crackers or digestive biscuits for the crust. The filling is naturally gluten-free.
10. Can I add other toppings besides cherry? Definitely. Strawberry compote, blueberry sauce, salted caramel, or even a dark chocolate ganache all pair beautifully with this creamy base filling.
Cherry Cheesecake Recipe – Creamy No-Bake Delight
Course: Cheesecake, DessertCuisine: AmericanDifficulty: EasyServings
6-10
slicesPrep time
25
minutesCalories
520
kcalTotal Time
8
HoursChill time
6-8
hoursIngredients
- Crust
2 cups (200g) graham cracker crumbs (about 14 full crackers)
¼ cup (50g) granulated sugar
½ cup (113g) unsalted butter, melted and slightly cooled
- Filling (all ingredients at room temperature — 68–70°F / 20–22°C)
24 oz (680g) full-fat block cream cheese (not spreadable tub)
1 cup (120g) powdered sugar, sifted
1 teaspoon pure vanilla extract
2 tablespoons fresh lemon juice
1½ cups (360ml) heavy whipping cream, very cold (straight from fridge)
- Topping
1 can (21 oz / 595g) cherry pie filling (or homemade cherry compote)
Optional: fresh Bing cherries for garnish
Directions
- Step 1 : Build the Crust
Combine graham cracker crumbs, sugar, and melted butter in a bowl. Mix until the texture resembles wet sand — every crumb should glisten with butter. Press firmly into the bottom and 1 inch up the sides of a 9-inch springform pan. Use the flat base of a measuring cup to compact it tightly with no gaps or thin patches. Freeze the crust for 15 minutes while you prepare the filling. - Step 2 : Whip the Cream to Stiff Peaks
Pour the cold heavy whipping cream into a large chilled bowl. Beat with a hand or stand mixer on medium-high speed for 2–3 minutes until stiff peaks form — the cream should hold its shape when the beaters are lifted and not slide. Do not over-whip. Set aside in the refrigerator. - Step 3 : Beat the Cream Cheese Until Velvet-Smooth
In a separate large bowl, beat the room-temperature cream cheese on medium speed for 3–4 full minutes until it is completely lump-free and fluffy — this step is the secret to ultra-creaminess. Scrape down the bowl sides twice. Add sifted powdered sugar, vanilla extract, and lemon juice. Beat again for 2 minutes until the mixture is silky, glossy, and smooth with no streaks. - Step 4 : Fold and Finish the Filling
Remove the whipped cream from the fridge. Using a large rubber spatula, gently fold the whipped cream into the cream cheese mixture in three additions — use wide, sweeping motions from the bottom up. Stop as soon as the batter is uniformly pale, airy, and cloud-like with no white streaks. Overmixing will deflate the filling and compromise creaminess. - Step 5 : Fill, Smooth, and Chill
Pour the filling into the frozen crust. Use an offset spatula to spread it into an even, domed layer — smooth the top with slow, confident strokes. Tap the pan gently on the counter twice to release air bubbles. Cover tightly with plastic wrap and refrigerate for a minimum of 6–8 hours. Overnight chilling produces the cleanest slices and fullest flavor development. - Step 6 : Top and Serve
Run a thin knife around the inside edge of the springform ring before releasing. Spoon the cherry pie filling over the chilled cheesecake, spreading to the edges. Slice with a sharp knife dipped in hot water and wiped dry between each cut for bakery-clean slices. Serve immediately or refrigerate topped for up to 24 hours.
Notes
- Room temperature is non-negotiable. Cold cream cheese will never fully smooth out, leaving a lumpy, dense filling. Pull it from the fridge at least 1 hour before mixing.
- Beat cream cheese alone first. Beating it solo before adding other ingredients breaks down every protein cluster — this is what separates a silky professional cheesecake from a grainy homemade one.
- Keep your cream cold. Unlike the cream cheese, the heavy cream must stay refrigerated until the moment you whip it. Warm cream won’t achieve stiff peaks.
- No water bath needed. Because this is a no-bake cheesecake, you bypass the cracking risk entirely. For baked versions, always use a water bath (bain-marie) and never open the oven during baking.
- Don’t rush the chill. Six hours is the minimum; overnight is ideal. The filling needs time to fully set so it slices cleanly without collapsing.
- Freeze for 30 minutes before slicing if you need ultra-precise, restaurant-style slices for photography or events.