The Best Fluffy Pancakes recipe you will fall in love with. Full of tips and tricks to help you make the best pancakes.
⭐⭐⭐⭐⭐ – Thickness Level: Ultra-Thick, Spoonable (You’ll want a wide straw or a spoon. Seriously.)
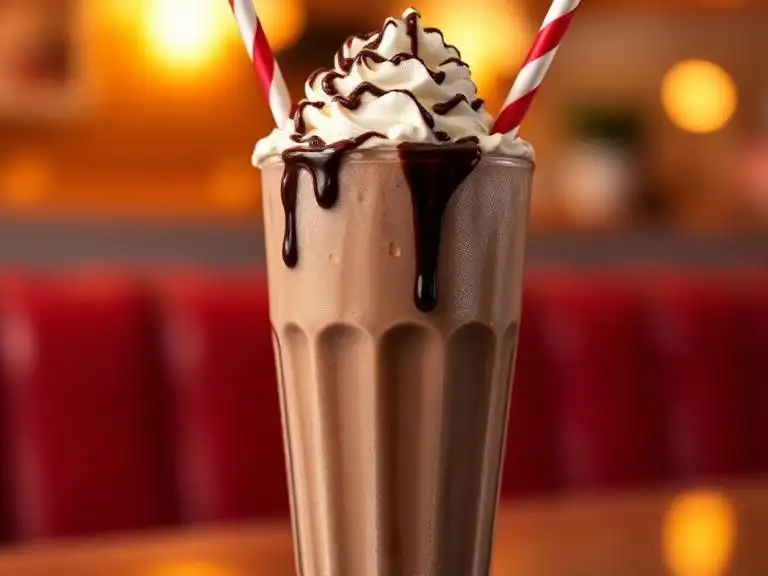
Some cravings don’t whisper — they demand. And for me, nothing hits quite like the craving for a thick, cold, deeply chocolate milkshake on a lazy afternoon. I’m talking about the kind you get at an old-school diner, where the glass fogs up the second it’s set down in front of you, and the straw practically stands on its own.
I’ve been chasing that texture and richness for years. After a lot of (very enjoyable) testing, I can honestly say this is the recipe. It’s ultra-thick, outrageously creamy, and genuinely simple — you need just five minutes and a blender. Whether you’re treating yourself after a long day or making something special for the kids, this homemade chocolate milkshake delivers every single time.
Quick Recipe Overview
| Prep Time | 5 minutes |
| Blend Time | 30–45 seconds |
| Total Time | 5 minutes |
| Servings | 1–2 |
Ingredients for the Perfect Chocolate Milkshake
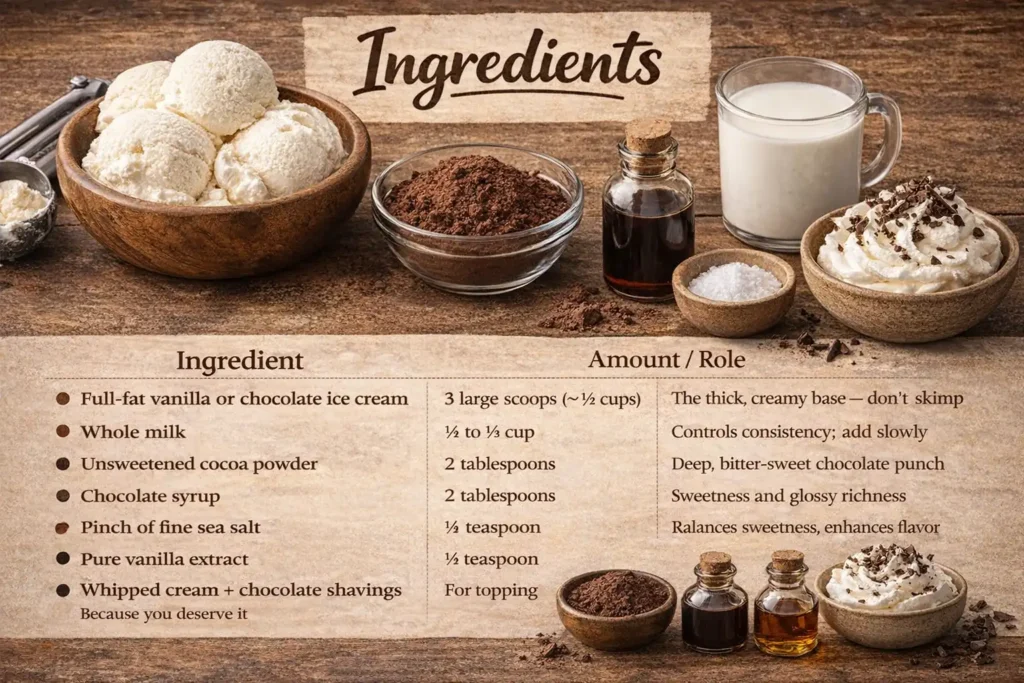
Here’s what you’ll need — and more importantly, why each ingredient is pulling its weight.
| Ingredient | Amount | Role |
|---|---|---|
| Full-fat vanilla or chocolate ice cream | 3 large scoops (~1½ cups) | The thick, creamy base — don’t skimp |
| Whole milk | ¼ to ⅓ cup | Controls consistency; add slowly |
| Unsweetened cocoa powder | 2 tablespoons | Deep, bitter-sweet chocolate punch |
| Chocolate syrup | 2 tablespoons | Sweetness and glossy richness |
| Pinch of fine sea salt | ⅛ teaspoon | Balances sweetness, enhances flavor |
| Pure vanilla extract | ½ teaspoon | Rounds out the chocolate notes |
| Whipped cream + chocolate shavings | For topping | Because you deserve it |
Ice Cream-to-Milk Ratio Tip: For a spoonable, ultra-thick milkshake, start with just ¼ cup of milk. If you prefer it drinkable through a straw, nudge it up to ⅓ cup — but go slowly. You can always thin it out; you can’t undo it.
How to Make a Chocolate Milkshake (Step-by-Step)
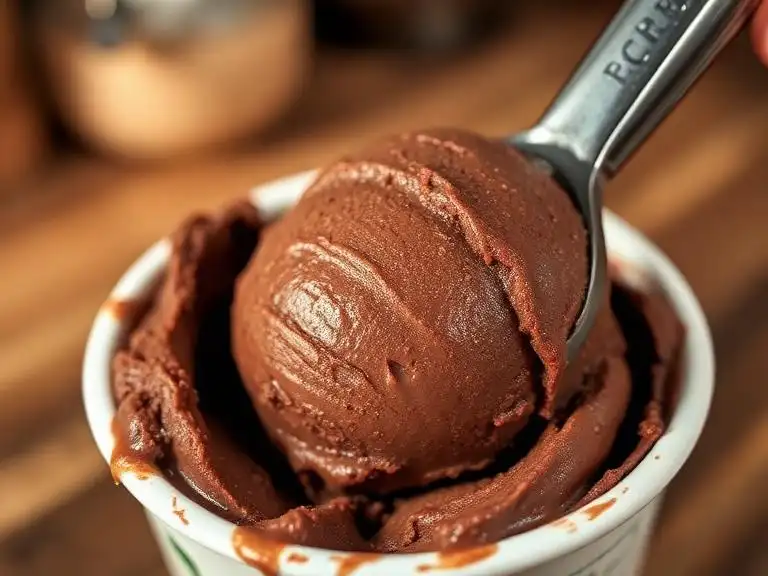
Step 1 : Add Ingredients
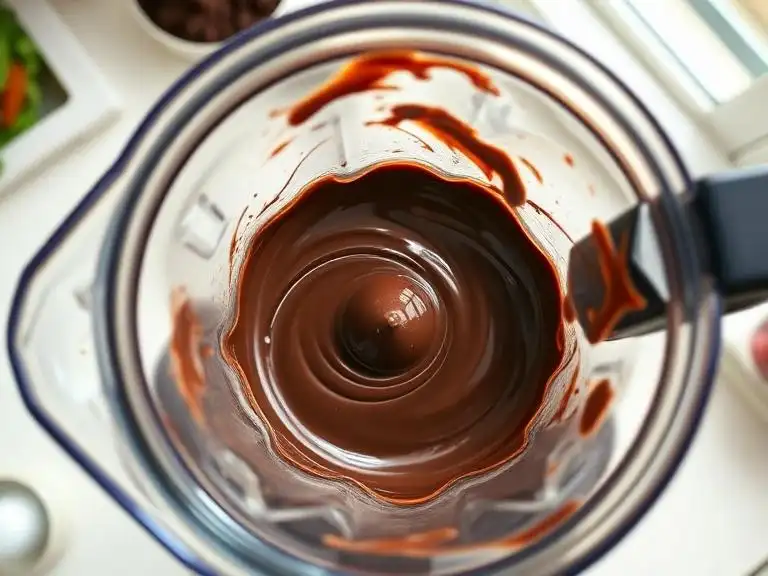
Scoop the ice cream directly into the blender — you’re looking for three generous, slightly overflowing scoops. Drizzle in the chocolate syrup, then dust the cocoa powder on top. Add the vanilla extract, pinch of salt, and finally pour the milk in last.
Step 2 : Blend Until Thick and Creamy
Put the lid on firmly (trust me on this one) and blend on medium speed for about 30 seconds. Stop the blender and check the consistency.
Thickness cue: It should look like soft-serve being pulled upward — it’ll hold a slight peak when you lift a spoon through it.
Step 3 : Check the Texture
This is the step most people skip, and it makes all the difference. If it’s too thick to move through the blender, add milk one tablespoon at a time and pulse again. If it’s thinner than you wanted, toss in another half-scoop of ice cream and blend for another 10 seconds.
Getting the texture right here means you get exactly the milkshake you want — not a generic one.
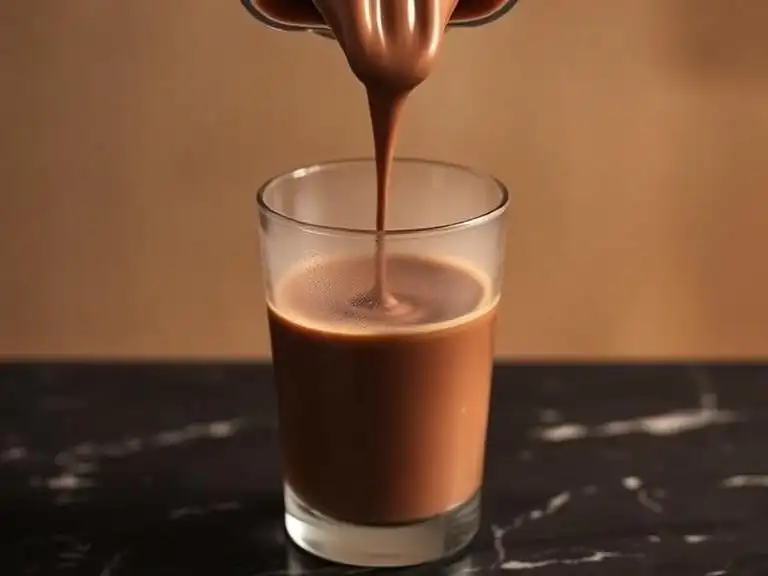
Step 4 : Pour and Serve
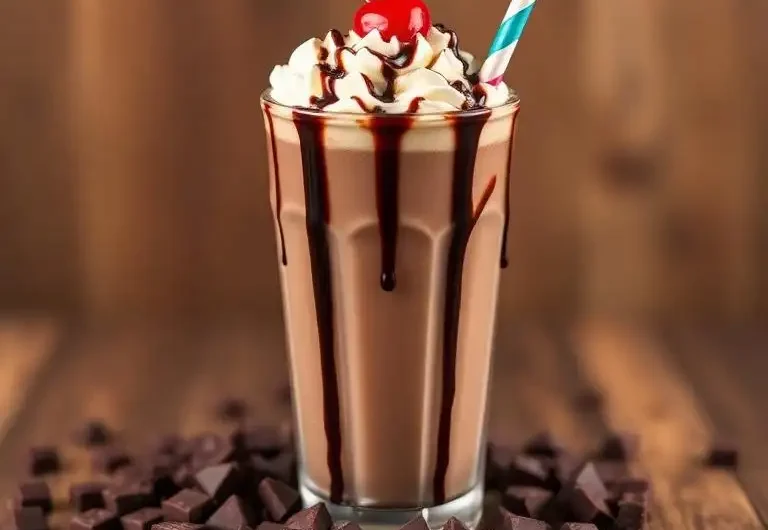
Pour slowly into a chilled glass — watch for that beautiful ribbon pour, where the milkshake falls in glossy, thick waves rather than splashing down. Top with a crown of whipped cream, a drizzle of chocolate syrup, and a few chocolate shavings if you’re feeling fancy.
Serve immediately. Don’t let this one sit around.
Milkshake Pro Tips (Diner Secrets)
- Chill your glass first. Pop it in the freezer for 10 minutes before pouring. Cold glass = milkshake stays thick longer.
- Use premium ice cream. The higher the fat content, the creamier and richer the result. Store-brand ice cream contains more air, which waters things down.
- Don’t over-blend. More blending = more heat from the motor = melted milkshake. Keep it short and stop the moment it’s smooth.
- Cocoa powder + syrup combo. Using both gives you complexity — the syrup adds sweetness and body, while the cocoa adds depth and a slight bitter edge.
- Room-temperature cocoa powder blends better. Cold clumps. Give your cocoa a quick whisk with the syrup before adding if you want a smoother base.
OTHER RECIPES :
- Chia Seeds in Fruit Smoothies: The Café-Style Recipe You Need
- The Best Peach Cobbler Recipe with Cake Mix So Easy So Delicious!
- Cloud Cake Recipe: Light, Airy, and Melt-in-Your-Mouth
Variations You Can Try
The Dubai Chocolate Milkshake Twist
Inspired by the viral Dubai chocolate sensation, this version layers your finished milkshake with a spoonful of pistachio cream and a crumble of shredded kataifi pastry (or crushed phyllo) on top. The result is nutty, floral, and impossibly rich — a genuine showstopper for guests.
Extra Thick Version
Skip the milk entirely. Blend only ice cream with cocoa powder, syrup, and salt. The texture will be closer to soft-serve than a traditional shake — you’ll need a spoon and zero regrets.
Dairy-Free Option
Swap the ice cream for a full-fat coconut milk-based chocolate ice cream, and use oat milk or full-fat coconut milk in place of whole milk. The result is surprisingly creamy and still delivers that rich chocolate drink experience you’re after.
Nutrition Information (Approximate)
Per serving (1 large glass, made with full-fat ingredients)
| Nutrient | Amount |
|---|---|
| Calories | 520–580 kcal |
| Total Fat | 22g |
| Saturated Fat | 13g |
| Carbohydrates | 72g |
| Sugar | 58g |
| Protein | 9g |
| Sodium | 210mg |
Why This Is a True Diner-Style Milkshake
Old-school diners don’t mess around. Their milkshakes are thick enough to make you work for it, rich enough to be a full dessert experience, and built on one principle: quality ingredients, minimal interference.
What makes this recipe genuinely diner-style is the technique — using whole milk (not low-fat), real ice cream with high butterfat, and a short blend time. You’re not making a smoothie. You’re building texture layer by layer and letting the cold do most of the work.
The cocoa-plus-syrup method also mirrors what most classic diner recipes use behind the counter. It’s the difference between a milkshake that tastes like chocolate and one that is chocolate.
Common Mistakes to Avoid
Adding too much milk. This is the number one culprit behind a watery, disappointing milkshake. Start with less than you think you need.
Over-blending. Every extra second in the blender warms your ingredients and introduces more air. Both things thin out your shake. Thirty to forty-five seconds is all you need.
Using the wrong ice cream. Low-fat or “frozen dairy dessert” products don’t have the same fat content and won’t create the same creamy texture. This is not the place to cut corners — get real, full-fat ice cream.
Skipping the salt. A tiny pinch of sea salt doesn’t make it salty — it makes everything else taste more. Don’t leave it out.
FAQ
How do I make a chocolate milkshake thicker? Use more ice cream and less milk. You can also pre-freeze your glass and blend for a shorter time. If it’s still not thick enough, add a half-scoop of ice cream and pulse again.
Can I make a chocolate milkshake without ice cream? Yes — blend 1 cup of frozen whole milk ice cubes, ½ a frozen banana, 2 tablespoons of cocoa powder, 2 tablespoons of chocolate syrup, and ¼ cup of milk. It won’t have the same richness, but it’s a solid alternative.
What is a Dubai chocolate milkshake? It’s a dessert-forward take on the classic, inspired by the viral “Dubai chocolate” trend featuring pistachio cream and kataifi (shredded wheat pastry). When blended into or layered on top of a milkshake, it creates a uniquely rich, nutty, and slightly floral flavor that’s become hugely popular on social media.
What’s the best ice cream for a chocolate milkshake? A high-quality vanilla ice cream lets the chocolate flavors you add shine brightest. Chocolate ice cream doubles down on richness and makes for an extra intense result. Either works — it depends on how deep you want to go.
Can I make this ahead of time? Not really. Milkshakes are best made and consumed immediately. If you need to prep, you can pre-measure your ingredients and keep everything chilled, then blend when ready.
How do I make it less sweet? Reduce or omit the chocolate syrup and use only cocoa powder. A darker, higher-cacao-content cocoa (like Dutch-process) also brings bitterness that naturally balances the sweetness.
Can kids have this? Absolutely — this is a classic family treat. If making for young children, skip the sea salt and keep portions smaller.
What blender works best? Any blender will do the job, but one with at least 600 watts handles thick mixtures more easily without overheating. A high-powered blender (like a Vitamix or Ninja) will give you a silkier result in less time.
How do I get the whipped cream to stay on top? Use heavy whipping cream and whip it to stiff peaks before spooning onto the milkshake. Canned whipped cream works too, but deflates faster. Serve immediately either way.
Can I add protein powder? Yes — add one scoop of chocolate or vanilla protein powder and an extra tablespoon of milk to compensate for the thickening. Blend for a few extra seconds to ensure it’s fully incorporated.
Conclusion
There’s something quietly joyful about making a milkshake from scratch — it takes five minutes, it costs almost nothing, and the result is deeply, honestly satisfying. This chocolate milkshake recipe is the kind you’ll make once and then think about again the next time life calls for something sweet and cold and a little indulgent.
Give it a try. Chill your glass, scoop generously, blend briefly, and pour slowly. You’ve got this — and your future self, straw in hand, will be very glad you did.
Ultimate Chocolate Milkshake Recipe: Creamy, Rich & Irresistible!
Course: Dessert, milkshakeCuisine: AmericanDifficulty: EasyServings
1-2
servingsPrep time
5
minutesTotal time
5
minutesCalories
520–580
kcalBlend Time
30-40
secondsSome cravings don’t whisper — they demand. And for me, nothing hits quite like the craving for a thick, cold, deeply chocolate milkshake on a lazy afternoon. I’m talking about the kind you get at an old-school diner, where the glass fogs up the second it’s set down in front of you, and the straw practically stands on its own.
I’ve been chasing that texture and richness for years. After a lot of (very enjoyable) testing, I can honestly say this is the recipe. It’s ultra-thick, outrageously creamy, and genuinely simple — you need just five minutes and a blender. Whether you’re treating yourself after a long day or making something special for the kids, this homemade chocolate milkshake delivers every single time.
Ingredients
Full-fat vanilla or chocolate ice creamWhole milk
Unsweetened cocoa powder
Chocolate syrup
Pinch of fine sea salt
Pure vanilla extract
Whipped cream + chocolate shavings
Directions
- Step 1 : Add Ingredients
Scoop the ice cream directly into the blender — you’re looking for three generous, slightly overflowing scoops. Drizzle in the chocolate syrup, then dust the cocoa powder on top. Add the vanilla extract, pinch of salt, and finally pour the milk in last. - Step 2 : Blend Until Thick and Creamy
Put the lid on firmly (trust me on this one) and blend on medium speed for about 30 seconds. Stop the blender and check the consistency.
Thickness cue: It should look like soft-serve being pulled upward — it’ll hold a slight peak when you lift a spoon through it. - Step 3 : Check the Texture
This is the step most people skip, and it makes all the difference. If it’s too thick to move through the blender, add milk one tablespoon at a time and pulse again. If it’s thinner than you wanted, toss in another half-scoop of ice cream and blend for another 10 seconds.
Getting the texture right here means you get exactly the milkshake you want — not a generic one. - Step 4 : Pour and Serve
Pour slowly into a chilled glass — watch for that beautiful ribbon pour, where the milkshake falls in glossy, thick waves rather than splashing down. Top with a crown of whipped cream, a drizzle of chocolate syrup, and a few chocolate shavings if you’re feeling fancy.
Serve immediately. Don’t let this one sit around.
Notes
- Chill your glass first. Pop it in the freezer for 10 minutes before pouring. Cold glass = milkshake stays thick longer.
- Use premium ice cream. The higher the fat content, the creamier and richer the result. Store-brand ice cream contains more air, which waters things down.
- Don’t over-blend. More blending = more heat from the motor = melted milkshake. Keep it short and stop the moment it’s smooth.
- Cocoa powder + syrup combo. Using both gives you complexity — the syrup adds sweetness and body, while the cocoa adds depth and a slight bitter edge.
- Room-temperature cocoa powder blends better. Cold clumps. Give your cocoa a quick whisk with the syrup before adding if you want a smoother base.