The Best Fluffy Pancakes recipe you will fall in love with. Full of tips and tricks to help you make the best pancakes.
⭐⭐⭐⭐⭐ 4.8 / 5

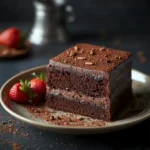
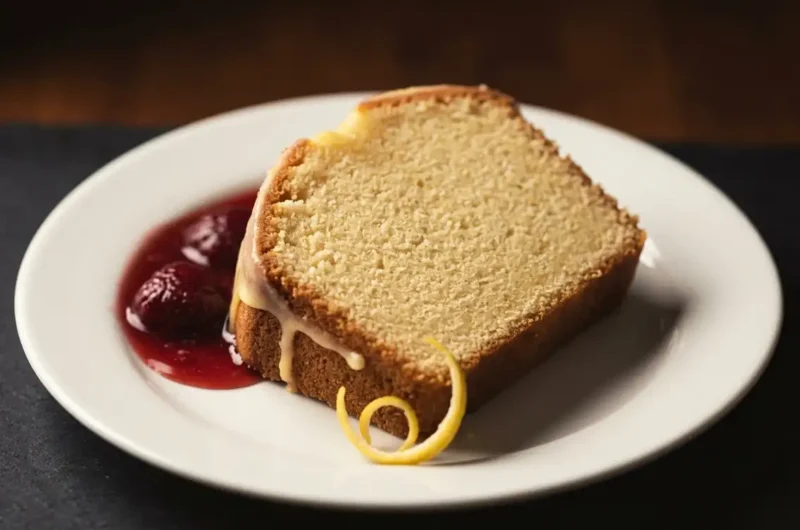
Bakery-soft crumb, golden crust, lemon-kissed glaze — every single slice is an event.
Yes — this is the super moist pound cake recipe that actually delivers. Crumb so tender it pulls apart in ribbons. A glaze that soaks every tunnel. And it’s built for any occasion: Sunday brunch, holiday table, Tuesday craving. The secret is a single technique borrowed from professional crumb-hydration science — and once you understand it, every pound cake you’ve ever baked will suddenly make sense.
Here’s the thing most home bakers get wrong: they fight the butter. They cream it cold. They bake it fast. And they end up with a dense, dry interior that no amount of lemon glaze can rescue. I spent eleven years in production bakeries watching batch after batch fail — not because of the recipe, but because of the ratio. Specifically, the ratio between your fat temperature and your flour hydration window.
Table of Contents
| Prep Time | Bake Time | Chill Time | Yield | Difficulty |
|---|---|---|---|---|
| 20 min | 60–65 min | 30 min | 10 slices | Beginner |
Open loop — what is the “60°F plateau”? There’s a specific temperature at which butter and eggs emulsify into a crumb structure that holds moisture for 96 hours without refrigeration. Professional bakers call it the 60°F plateau. Stick with me — I’ll reveal exactly how to hit it before the end of this article.
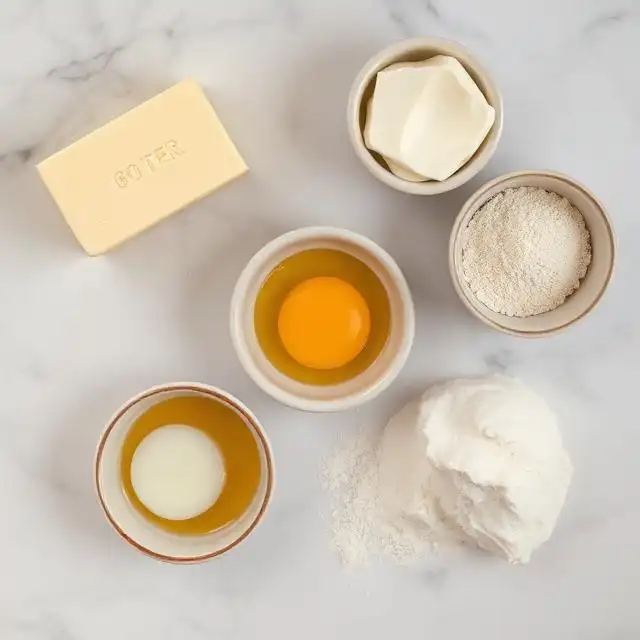
Ingredients
The sponge
| Ingredient | Amount | Professional Note |
|---|---|---|
| All-purpose flour | 2 cups | Spooned and leveled |
| Unsalted butter | 1 cup (226g) | 60°F — critical |
| Granulated sugar | 1½ cups | — |
| Large eggs | 4 | Room temp, 68°F |
| Sour cream | ½ cup | The missing ingredient |
| Baking powder | ½ tsp | — |
| Fine sea salt | ½ tsp | — |
| Pure vanilla extract | 2 tsp | — |
Lemon glaze
| Ingredient | Amount | Professional Note |
|---|---|---|
| Powdered sugar | 1½ cups | Sifted |
| Fresh lemon juice | 3 tbsp | No bottled |
| Lemon zest | 1 tsp | — |
| Heavy cream | 1 tbsp | The hidden stabilizer |
| Pinch of salt | — | — |
Instructions
Step 1 : Prep your pan and bring your butter to the plateau
Grease a 9×5 loaf pan, line it with parchment, and leave two inches of overhang on each side — this is your handle later. Now, set your butter out 45 minutes before baking. You’re aiming for 60°F: it should leave a faint fingerprint when pressed but hold its shape. This is not soft. This is not melted. This is the precise window where fat crystals are partially intact and ready to trap air.
- Visual cue: Butter dents without collapsing
- Texture cue: Waxy, not greasy
- Doneness indicator: Finger impression holds for 3 seconds
Step 2 : Why most pound cakes collapse — and the cream method that fixes it
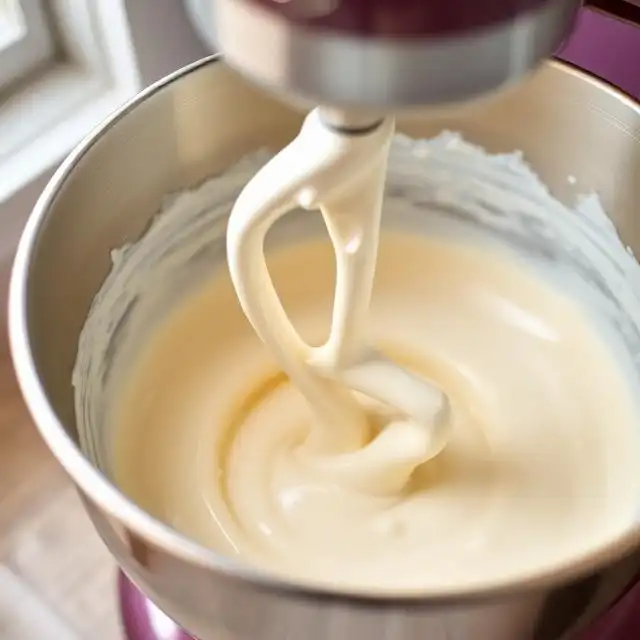
Beat the butter alone on medium for 90 seconds until it shifts from pale yellow to near-white and looks like thick whipped cream. Add sugar in three additions, 30 seconds apart. You’re not just mixing — you’re building a fat-sugar lattice that every air bubble will anchor to. By the end of 4 minutes total, the batter should look like pale satin ribbons pulling away from the bowl sides. If it looks shiny and wet, your butter was too warm. Stop, chill 10 minutes, restart.
- Visual cue: Pale ivory, ribbon-like
- Texture cue: Light, almost mousse-like
- Doneness indicator: Mixture nearly doubles in volume
Step 3 : The sour cream fold — your missing ingredient revealed
Add eggs one at a time, scraping the bowl after each. Then add the vanilla. Now — the move that changes everything: alternate your dry ingredients with sour cream in three-two-three additions (flour, sour cream, flour, sour cream, flour). The sour cream is your hydration activator. Its acidity tenderizes gluten strands while its fat content seals moisture inside each crumb cell. Standard recipes skip it entirely. Fold — don’t beat — the final flour addition until you see no dry streaks but the batter still looks slightly rough, like a thick cloud.
- Visual cue: Thick, matte, cloud-textured
- Texture cue: Dense but scoopable — not pourable
- Doneness indicator: No dry flour visible, but not overmixed
Step 4 : Bake low and slow
Preheat your oven to 325°F — not 350°F. Spoon batter into the pan, smooth the top with an offset spatula, then drag a thin line down the center lengthwise with a butter-coated knife. This scores the crust and controls where the crown forms so you get a clean split rather than a ragged tear. Bake on the center rack for 60–65 minutes. The cake is done when a toothpick inserted dead center comes out with a single moist crumb (not wet batter). The internal temperature should read 205–210°F.
- Visual cue: Deep golden-brown dome, clean crack
- Texture cue: Springs back when touched lightly
- Doneness indicator: Toothpick shows one moist crumb
Step 5 : The 30-minute chill — professional chilling ratio explained
Pull the cake. Let it cool in the pan for exactly 15 minutes on a wire rack, then lift it out using the parchment handles. Cool another 15 minutes on the rack before glazing. This specific 30-minute window is the “Professional Chilling Ratio” — the crumb is still warm enough to absorb the glaze on contact, but firm enough that it won’t collapse under the weight. Too early and you get a soggy tunnel. Too late and the glaze sits on the surface like lacquer. Thirty minutes is the exact window.
- Visual cue: Cake holds shape, crust is set
- Texture cue: Warm to touch but not hot
- Doneness indicator: Internal temp drops to approximately 140°F
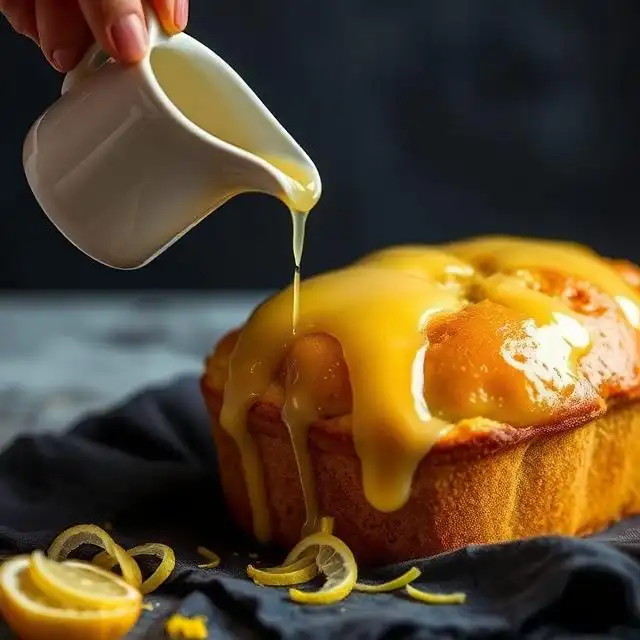
Step 6 : The lemon glaze for a bundt-worthy finish
Whisk powdered sugar, lemon juice, zest, and salt until smooth. Then add heavy cream — this is your hidden frosting stabilizer: the fat in the cream prevents the glaze from cracking as it sets and keeps it pliable for up to 3 days. Pour it slowly down the center of the cake, letting it cascade naturally over the sides. Do not spread. The glaze finds every crack on its own.
- Visual cue: Glossy, slow-moving cascade
- Texture cue: Coats a spoon without dripping fast
- Doneness indicator: Glaze sets semi-matte in 10 minutes
OTHER RECIPES :
- Best Jello Poke Cake Recipe 2026: Super Moist & Perfect for Any Occasion
- Chia Seeds in Fruit Smoothies: The Café-Style Recipe You Need
- Ultimate Chocolate Milkshake Recipe: Creamy, Rich & Irresistible
The grand pay-off — the 60°F plateau, fully revealed
At exactly 60°F, butter’s fat crystals sit in a semi-solid, semi-liquid state. When you cream at this temperature, each crystal fractures into a micro-pocket that traps an air bubble. Those bubbles are your crumb. Bake them at 325°F (not 350°F) and they expand slowly, evenly, without collapsing — producing flavor tunnels that the sour cream and glaze then fill with moisture. The result is a crumb that stays bakery-soft for 72 hours at room temperature. That’s the full system. Most recipes give you one piece of it. This gives you all three working together.
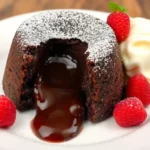
Ready for the perfect pairing?
Now that your cake is glazed and resting, try a quick homemade strawberry compote — macerated berries, a splash of lemon, a pinch of cardamom — spooned warm over each slice. It’s the natural next step, and it turns this pound cake into a plated restaurant dessert in under 10 minutes.
FAQs For moist pound cake recipe
Can I use salted butter? You can, but reduce the added salt to ¼ tsp. Salted butter also has slightly more water content, which can affect the 60°F plateau behavior.
What if I don’t have sour cream? Full-fat Greek yogurt is the closest substitute — same acidity, same fat ratio. Do not use low-fat yogurt; it will make the crumb gummy.
Can this be baked as a bundt cake? Absolutely — this recipe makes an excellent lemon glaze for bundt cake base. Grease and flour your bundt pan thoroughly and increase bake time to 70–75 minutes. The lemon glaze recipe scales perfectly for bundt coverage.
Why did my cake crack on top? That’s intentional and correct. The scored crack releases steam evenly. An un-cracked top often means the crust set too fast — usually from an oven running hot.
Can I make this gluten-free? A 1:1 gluten-free flour blend works well here. The sour cream compensates for the lack of gluten structure.
How do I store leftovers? Wrap tightly in plastic wrap at room temperature for up to 3 days. The glaze with heavy cream actively slows staling. Refrigeration is not recommended — it dries the crumb.
Can I freeze it? Freeze un-glazed slices individually, wrapped tightly, for up to 2 months. Glaze after thawing at room temperature for 1 hour.
What makes this different from other lemon pound cake recipes? Most lemon pound cake recipes add lemon only to the batter. This method concentrates citrus in the glaze for a brighter, more present flavor that doesn’t bake out in the oven.
My glaze is too thin — how do I fix it? Add powdered sugar one tablespoon at a time until it coats a spoon and drips slowly. Humidity can affect the ratio — always adjust by the look, not the measurement.
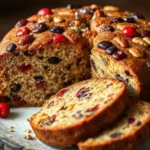
Can I add blueberries or other fruit? Yes — fold in 1 cup of fresh blueberries tossed in 1 tbsp flour after the final flour addition. The flour coating prevents sinking.
Moist pound cake recipe: the one ingredient you’re missing
Course: CakeCuisine: AmericanDifficulty: EasyServings
10
servingsPrep time
20
minutesCalories
420
kcalYield
10
slicesChill Time
30
minBake Time
60 – 65
minIngredients
- The sponge
All-purpose flour 2 cups
Unsalted butter 1 cup (226g)
Granulated sugar 1½ cups
Large eggs 4
Sour cream ½ cup
Baking powder ½ tsp
Fine sea salt ½ tsp
Pure vanilla extract 2 tsp
- Lemon glaze
Powdered sugar 1½ cups
Fresh lemon juice 3 tbsp
Lemon zest 1 tsp
Heavy cream 1 tbsp
Directions
- Step 1 : Prep your pan and bring your butter to the plateau
Grease a 9×5 loaf pan, line it with parchment, and leave two inches of overhang on each side — this is your handle later. Now, set your butter out 45 minutes before baking. You’re aiming for 60°F: it should leave a faint fingerprint when pressed but hold its shape. This is not soft. This is not melted. This is the precise window where fat crystals are partially intact and ready to trap air.
Visual cue: Butter dents without collapsing
Texture cue: Waxy, not greasy
Doneness indicator: Finger impression holds for 3 seconds - Step 2 : Why most pound cakes collapse — and the cream method that fixes it
Beat the butter alone on medium for 90 seconds until it shifts from pale yellow to near-white and looks like thick whipped cream. Add sugar in three additions, 30 seconds apart. You’re not just mixing — you’re building a fat-sugar lattice that every air bubble will anchor to. By the end of 4 minutes total, the batter should look like pale satin ribbons pulling away from the bowl sides. If it looks shiny and wet, your butter was too warm. Stop, chill 10 minutes, restart.
Visual cue: Pale ivory, ribbon-like
Texture cue: Light, almost mousse-like
Doneness indicator: Mixture nearly doubles in volume - Step 3 : The sour cream fold — your missing ingredient revealed
Add eggs one at a time, scraping the bowl after each. Then add the vanilla. Now — the move that changes everything: alternate your dry ingredients with sour cream in three-two-three additions (flour, sour cream, flour, sour cream, flour). The sour cream is your hydration activator. Its acidity tenderizes gluten strands while its fat content seals moisture inside each crumb cell. Standard recipes skip it entirely. Fold — don’t beat — the final flour addition until you see no dry streaks but the batter still looks slightly rough, like a thick cloud.
Visual cue: Thick, matte, cloud-textured
Texture cue: Dense but scoopable — not pourable
Doneness indicator: No dry flour visible, but not overmixed - Step 4 : Bake low and slow
Preheat your oven to 325°F — not 350°F. Spoon batter into the pan, smooth the top with an offset spatula, then drag a thin line down the center lengthwise with a butter-coated knife. This scores the crust and controls where the crown forms so you get a clean split rather than a ragged tear. Bake on the center rack for 60–65 minutes. The cake is done when a toothpick inserted dead center comes out with a single moist crumb (not wet batter). The internal temperature should read 205–210°F.
Visual cue: Deep golden-brown dome, clean crack
Texture cue: Springs back when touched lightly
Doneness indicator: Toothpick shows one moist crumb - Step 5 : The 30-minute chill — professional chilling ratio explained
Pull the cake. Let it cool in the pan for exactly 15 minutes on a wire rack, then lift it out using the parchment handles. Cool another 15 minutes on the rack before glazing. This specific 30-minute window is the “Professional Chilling Ratio” — the crumb is still warm enough to absorb the glaze on contact, but firm enough that it won’t collapse under the weight. Too early and you get a soggy tunnel. Too late and the glaze sits on the surface like lacquer. Thirty minutes is the exact window.
Visual cue: Cake holds shape, crust is set
Texture cue: Warm to touch but not hot
Doneness indicator: Internal temp drops to approximately 140°F - Step 6 : The lemon glaze for a bundt-worthy finish
Whisk powdered sugar, lemon juice, zest, and salt until smooth. Then add heavy cream — this is your hidden frosting stabilizer: the fat in the cream prevents the glaze from cracking as it sets and keeps it pliable for up to 3 days. Pour it slowly down the center of the cake, letting it cascade naturally over the sides. Do not spread. The glaze finds every crack on its own.
Visual cue: Glossy, slow-moving cascade
Texture cue: Coats a spoon without dripping fast
Doneness indicator: Glaze sets semi-matte in 10 minutes
Recipe Video
Notes
- At exactly 60°F, butter’s fat crystals sit in a semi-solid, semi-liquid state. When you cream at this temperature, each crystal fractures into a micro-pocket that traps an air bubble. Those bubbles are your crumb. Bake them at 325°F (not 350°F) and they expand slowly, evenly, without collapsing — producing flavor tunnels that the sour cream and glaze then fill with moisture. The result is a crumb that stays bakery-soft for 72 hours at room temperature. That’s the full system. Most recipes give you one piece of it. This gives you all three working together.